
Date
Mon Oct 12Siding moisture damage Washington homeowners notice may begin as a small stain, a soft board, or paint that no longer lies flat. Those signs can point to water getting behind the exterior, but they do not reveal the full path or the extent of damage. A careful assessment starts by noting where the signs appear, checking nearby details from a safe position, and tracing likely sources before choosing a repair.
What can siding moisture damage look like?
Water-related changes can show up on the siding surface or at joints and transitions. One symptom alone does not prove that water has reached the wall framing. Look for patterns, especially where several signs occur together or return after rain.
- Swelling or distortion: Boards may look bowed, cupped, buckled, or uneven. A localized change can point to a nearby leak or a detail that holds water.
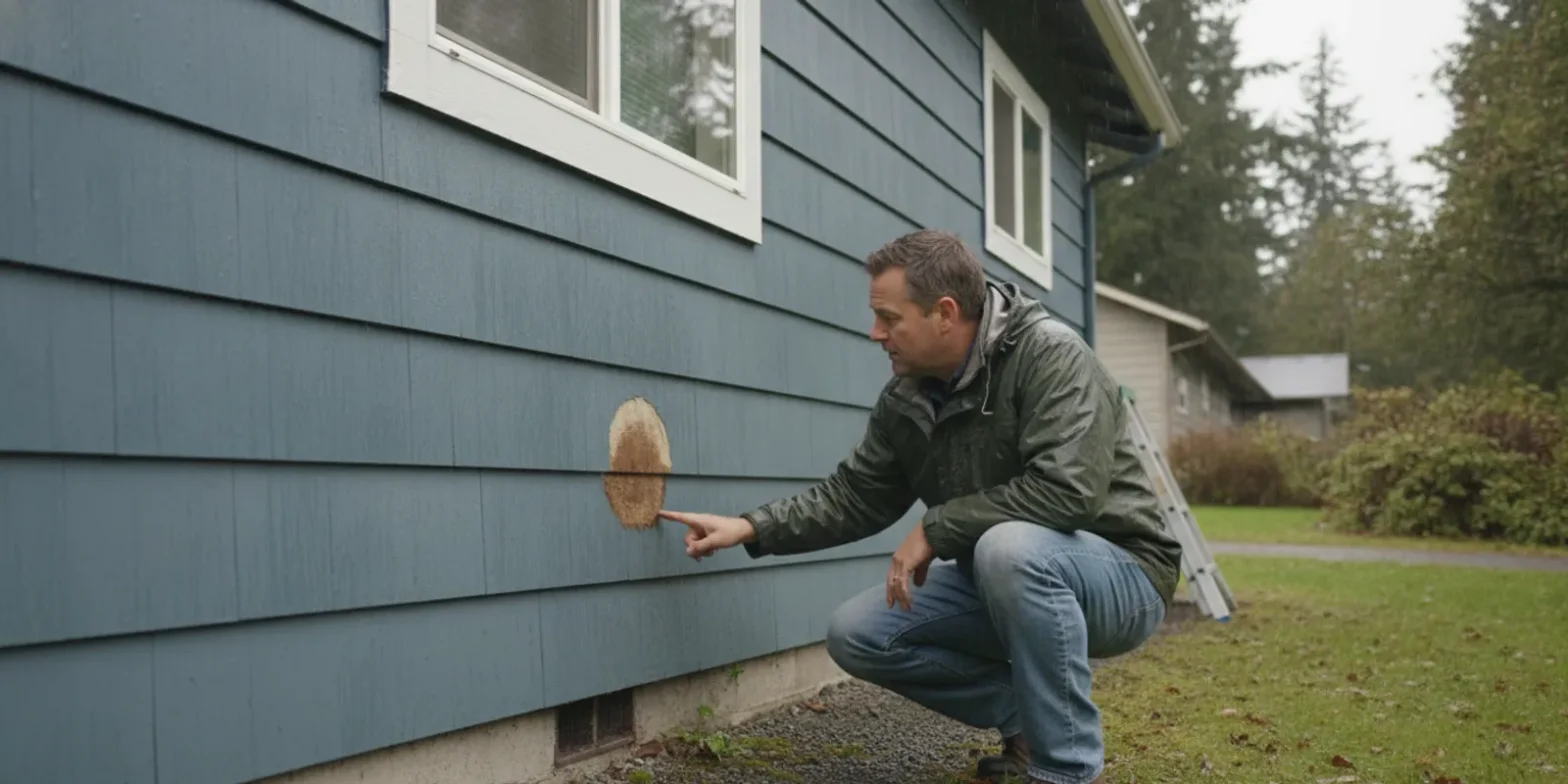
- Soft or crumbling material: Wood siding that gives way under light pressure, flakes at an edge, or breaks apart deserves attention. Do not probe aggressively; that can enlarge damage.
- Peeling or blistering finish: A coating that lifts may be related to moisture, but age, poor adhesion, or other conditions can also contribute. Treat it as a clue, not a diagnosis.
- Dark marks, streaks, or persistent dampness: Discoloration beneath a window, beside a downspout, or near a roof-to-wall intersection can help identify where to investigate.
- Gaps, loose edges, or failed joints: Open seams and separated trim can create entry points or allow water to move behind the cladding.
- Interior clues: A musty odor, a stain on an interior wall, or damaged interior trim near an exterior wall may indicate a broader moisture concern. These symptoms can have causes other than siding.
Take note of the location and whether the symptom changes after wet weather. Photos taken from the same spot over time can help show whether an area is spreading. Avoid ladders, roof access, and removing siding to investigate; a qualified inspection can check concealed areas more safely.
Compare the visible mark with the surfaces around it. For example, a narrow stain directly below a window is different from broad discoloration that follows the bottom edge of several boards. Note whether nearby trim is also loose, whether the ground below stays wet, and whether the symptom appears on one wall or several. These details do not identify the source on their own, but they give an inspector a useful starting map.
Where does water often get behind siding?
Siding is one part of an exterior wall assembly. Windows, doors, roof edges, penetrations, corners, and the ground-level transition all need to manage water too. A leak may start at one of these details and appear on siding some distance away, so replacing the visibly damaged section without finding the entry route may leave the cause in place.
In Washington, repeated rain and extended damp periods make it useful to inspect the wall after wet weather. Pay attention to locations where water collects or where one exterior component meets another:
- Window and door openings: Look for staining below a sill, separated trim, or a caulk joint that has pulled away. Sealant is not a substitute for properly integrated flashing.
- Roof-to-wall intersections: Water can be directed toward siding where roof edges, wall coverings, and flashing meet. A mark near this transition may need a roofing as well as a siding assessment.
- Penetrations and attachments: Vents, pipes, lights, and other wall openings need suitable flashing and sealing details. Loose or damaged edges can let water enter.
- Decks, steps, and trim: Attached structures and horizontal surfaces can interrupt drainage or keep siding wet if their connections are not managed well.
- Ground clearance and drainage: Soil, mulch, or stored items in contact with siding can hold moisture against the wall. Downspouts that discharge beside the foundation can also leave nearby areas persistently wet.
- Cracked, loose, or poorly maintained siding: Damaged boards and open joints can allow water behind the exterior finish, especially when wind-driven rain reaches the wall.
Do not assume every gap should be caulked. Some wall assemblies rely on drainage and ventilation paths, and sealing an intended opening can interfere with how water exits. If you are unsure whether a joint is meant to be open or sealed, document it and ask a siding professional to assess the detail.
Consider the whole route rainwater could take, rather than only the point where the stain appears. Water can run down from a higher opening, follow a trim edge, and emerge lower on the wall. A downspout splash zone may explain repeated wetting near the foundation, while a mark high on a wall may call for a closer look at the roof edge or an upper-story opening. Note these possible connections without removing materials or making assumptions about concealed construction.
How can you inspect a damp siding area safely?
A homeowner’s first check should be visual and limited to places reachable from the ground. The goal is to record clues, not to diagnose concealed framing or dismantle the wall. Use this sequence to make an inspection more useful:
- Map the symptoms. Write down which wall and which level show the problem. Note whether it is below a window, beside a corner, or near a roof connection.
- Photograph the area. Include a wider image showing nearby windows, trim, roof edges, and downspouts, then a closer image of the visible change. Record the date and weather conditions.
- Look for an associated water source. From the ground, check for a disconnected downspout, debris that blocks drainage, a visible opening, or a surface that directs water toward the wall. Do not climb to inspect a roof or upper story.
- Check for changes indoors. Note stains, damp smells, or damaged trim on the corresponding interior wall. Do not cut into a wall or disturb suspect materials.
- Track recurrence. Record whether the area dries between storms or becomes wet again. A repeating pattern can help an inspector narrow down when and where water enters.
- Arrange a qualified assessment. Ask the inspector to explain the likely water path, what evidence is visible, what areas remain concealed, and what additional evaluation may be appropriate.
Make the record specific enough to be useful. Instead of writing “wall gets wet,” note that a stain appeared below the left side of a second-story window after several hours of rain, then whether it faded or returned. If you have photos from before the change, keep them with the new images. A timeline can also include recent work on gutters, roofing, windows, or siding. This helps distinguish a recurring condition from a new one without treating timing alone as proof of cause.
Prompt attention is sensible if siding is soft, a wall feels damp indoors, a stain is expanding, or water is actively entering. If there is immediate danger from loose material or water near electrical equipment, keep clear and contact the appropriate qualified professional. Do not rely on a surface treatment to solve a leak whose source is unknown.
What can you do while waiting for an assessment?
If water is actively entering, move belongings away when safe and contact a qualified professional promptly. Do not approach electrical hazards or unstable siding. For a small area that is no longer getting wet, avoid covering it, applying a new finish, or pushing tools into a seam; these steps can hide clues or disturb the wall.
Keep the area accessible and share photos and notes with the inspector. Record when the problem appeared, whether it followed a storm or repair, and any related work on a window, roof edge, gutter, or wall opening. A surface that dries between storms does not establish that concealed materials are dry, so note whether symptoms return.
Do not use a household moisture meter reading or a quick touch test as a final verdict about the wall. Readings can vary with the material, location, and conditions, and a surface may feel dry while the area behind it remains damp. If you use any monitoring tool, share the readings and where you took them with the professional rather than using them to rule out a problem. Keep children and pets away from loose or deteriorated material, and avoid storing items directly against a damp wall while the source is being assessed.
What should an inspection establish before repairs?
A useful assessment should connect the visible symptom to a likely source and describe the limits of what could be observed. Depending on access and the condition of the wall, the inspector may examine siding, trim, flashing, joints, drainage, and nearby roof or window details. If material needs to be opened to confirm hidden conditions, discuss the scope and approval before that work begins.
Ask for clear answers to these questions:
- Where does water appear to enter, and what observations support that conclusion?
- Is damage limited to the siding, or might sheathing and other concealed parts also be affected?
- What must be removed or opened to check the hidden area, and how will the opening be protected?
- Which source needs correction before the siding is repaired?
- What materials and details will be used to restore the affected section?
- How will the contractor confirm the repair is complete, and what maintenance should follow?
When an assessment identifies a possible moisture issue within a wall assembly, avoid assuming that adding insulation is either the cause or the solution. A field study archived by Oak Ridge National Laboratory examined moisture damage in insulated walls and concluded that adding insulation did not increase condensation in the studied cases. The report is not a diagnosis for a particular Washington home; site conditions and wall design matter. Read the Oak Ridge National Laboratory field study for its specific findings.
Ask how the inspection distinguishes a confirmed observation from a possible explanation. For instance, visible staining may be certain, while the exact point of entry remains uncertain until a detail is examined more closely. A clear report should say what was checked, what could not be seen, and whether further investigation is recommended. If limited removal is proposed, understand what the opening will expose, how the area will be protected from weather, and who will approve any additional work if the concealed condition differs from expectations.
Should you dry, repair, or replace the siding?
The right response depends on the source, the type and extent of damage, and whether the wall beneath is affected. Drying a surface is not enough if water continues to enter. Likewise, replacing an entire wall is not automatically necessary because one board looks damaged. A qualified inspection helps distinguish a limited repair from a larger project.
| Observed condition | Possible next step | What to confirm |
|---|---|---|
| Brief dampness with no visible material change | Address the obvious drainage or water-management issue and monitor the area | Whether the wall dries and the symptom stays away after wet weather |
| One localized damaged board or trim section | Repair or replace the affected section after correcting the entry path | Whether adjacent siding and concealed material are sound |
| Recurring moisture, several damaged areas, or open transitions | Inspect connected details and plan coordinated repairs | How water moves across the wall and whether more than one source is involved |
| Widespread deterioration or damage extending behind the siding | Consider broader siding replacement or wall repairs based on inspection findings | The full repair scope, materials, sequencing, and how the wall will be protected |
Ask for a written scope that identifies the affected area, the cause being addressed, work needed behind the siding if discovered, and any exclusions. If hidden damage is possible, ask how additional findings will be documented and approved before the work expands. Compare scopes by what they include, not only by the visible square footage or a single total.
Repair sequencing matters. The water source should be addressed before damaged siding is closed up or covered with new material. Depending on what the assessment finds, the work may include correcting a drainage detail, replacing a limited section, or coordinating repairs around a window or roof transition. Ask how the crew will protect exposed areas if rain is possible, how adjacent finishes will be handled, and what condition would prompt a pause to review newly discovered damage. Those details make two estimates easier to compare even when their proposed scopes differ.
For a larger project, review the contractor’s plan for protecting the home from rain while siding is removed, handling discovered damage, and coordinating flashing with windows, doors, and roof intersections. Landmark provides residential siding services; the relevant scope for a particular home should be confirmed through an assessment. Homeowners planning more than one exterior improvement can also review the company’s roofing services and siding project gallery as they compare options.
If the home has a particular siding material or detail, ask what replacement components are available and how the repair will meet the existing assembly. A sound proposal should not promise that a cosmetic patch will resolve a moisture condition without addressing the cause. The homeowner FAQs may help you prepare general questions, but the inspection findings and agreed scope should guide decisions for the affected wall.
How can you reduce repeat moisture problems?
Prevention starts with keeping water moving away from the wall and noticing small changes before they spread. A few practical habits can help you identify trouble early:
- Keep gutters and downspouts clear and direct discharge away from the siding and foundation.
- Keep soil, mulch, and stored items from resting against the siding. Follow the siding manufacturer’s guidance for clearance and maintenance.
- Look over accessible siding and trim periodically for loose pieces, separated joints, or changes below openings.
- After a major storm, check from the ground for displaced siding, fallen branches, or a new stain. Avoid walking on the roof.
- Maintain records of repairs, product information, and inspection notes so later work can account for what has already been addressed.
- Have unusual or recurring dampness evaluated instead of covering it with a fresh surface finish.
Routine observation does not replace a professional inspection when damage is recurring or concealed. If you are planning work in Redmond, Bellevue, Seattle, or another Washington service area, describe the affected wall and the symptoms you have recorded when arranging an assessment.
Get help evaluating siding moisture damage
Frequently Asked Questions
Can siding look damaged even if the wall is dry?
Yes. Sun exposure, age, impact, or coating failure can change the siding’s appearance without proving that moisture is behind it. An inspection can look for related evidence and assess whether the material is still sound.
Should I caulk every visible gap in siding?
No. Some joints are designed to drain or ventilate, while others need flashing or a seal. Applying caulk indiscriminately can block a drainage route. Ask a qualified siding professional to identify what the particular detail requires.
Can I replace one board before finding the leak?
A localized board may be repairable, but replacing it before identifying the water path can leave the underlying cause unchanged. Have recurring or soft areas assessed first, especially if damage is near a window, roof edge, or wall penetration.
Does moisture damage always mean the entire siding must be replaced?
No. The repair may be limited if damage is confined and the surrounding wall is sound. Broader replacement may be considered when deterioration is widespread or concealed damage is found. The inspection and written scope should explain why a repair path is recommended.
Record what you see, address obvious drainage problems safely, and get a qualified assessment when moisture returns or materials feel soft. Finding the water path before choosing a repair gives you a clearer basis for protecting the wall.