
Date
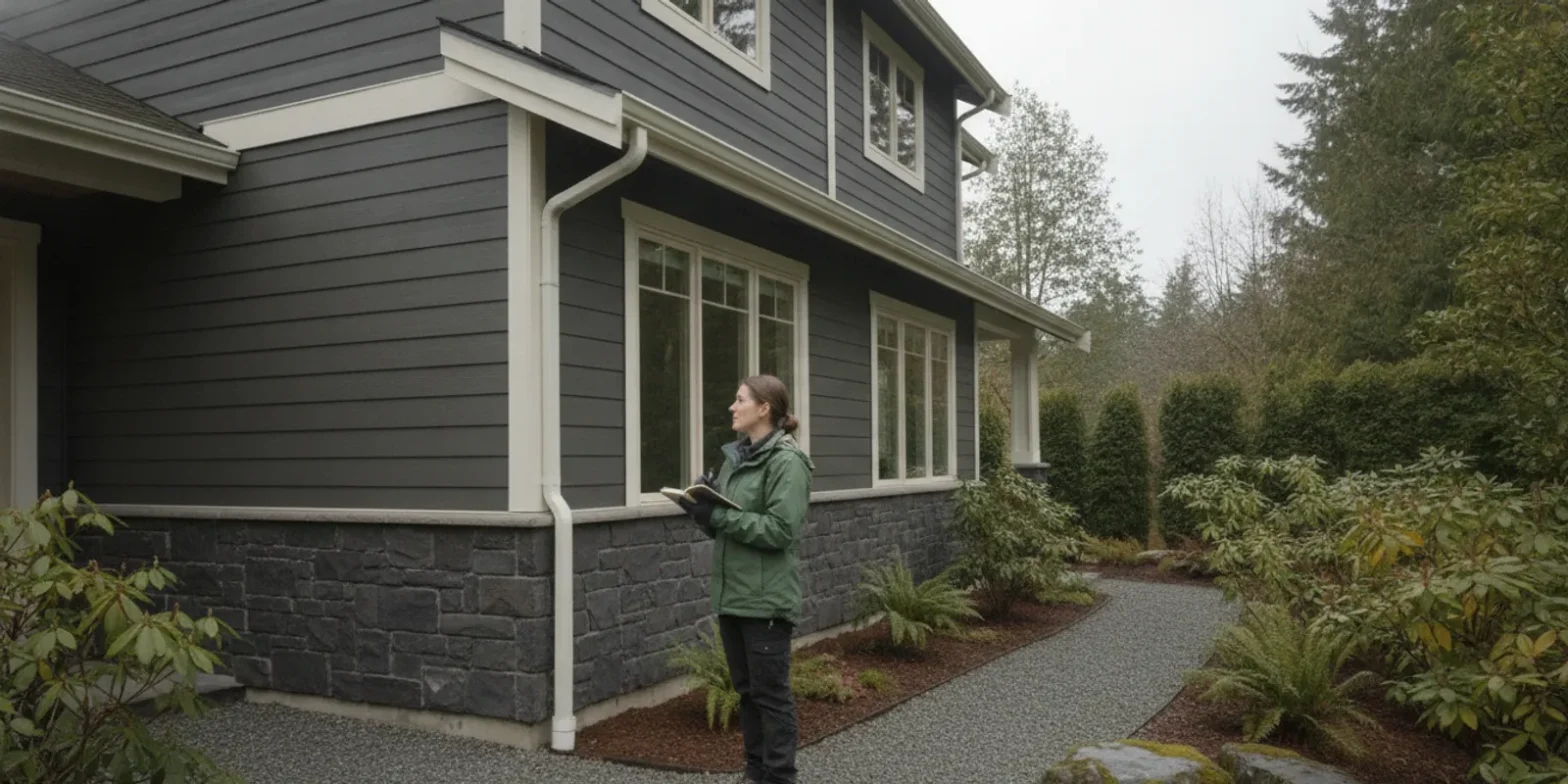
Tue Oct 13A siding inspection checklist helps you review the outside of your Washington home in a consistent way. Look at the siding, trim, joints, and nearby areas for visible changes, then record what you find rather than trying to diagnose a hidden problem from the ground.
What should you prepare before inspecting siding?
Choose a dry, well-lit time when you can see the walls clearly. You can make a useful first review from the ground without climbing a ladder or removing any material. Never lean a ladder against siding to get a closer look; arrange a qualified inspection if an area cannot be viewed safely.
Bring a phone or camera, a notepad, and binoculars if you have them. Use the camera to record the location and appearance of a concern from a safe position. Do not poke, pull, or press hard on a panel, pry at a joint, or apply water to test for leaks. Those actions can damage siding or send water behind it.
Start with a simple map of the exterior. Note each side of the house as front, back, left, and right, or use compass directions if you know them. Mark windows, doors, corners, and ground-level transitions. A consistent map makes it easier to find a spot again and explain it during a residential siding assessment.
Before walking around, check the route for slippery surfaces, uneven ground, pets, and stored items. Stay on stable paths and do not step onto a deck edge, retaining wall, or other raised surface to gain a better view. Binoculars can help with distant details, but they do not make an unsafe climb necessary. If weather or poor light makes a feature hard to see, note that limitation and return when conditions improve.
How do you inspect each wall systematically?
Stand back far enough to see most of one wall at a time. Look across the surface for changes in alignment, color, texture, or shadow. Then scan from top to bottom in sections. Repeat the same process on every side, including walls partly hidden by shrubs or fences where access is safe.
- Look for loose or displaced sections. Notice panels that appear lifted, bowed, uneven, or out of line with adjacent courses. Do not push them back into place.
- Check for visible breaks. Record cracks, holes, splits, dents, chips, or missing pieces. Note whether the mark appears isolated or continues across several sections.
- Compare neighboring areas. A single changed panel may call for a different evaluation than a broad area with similar changes. Record the approximate size and position instead of guessing at a cause.
- Observe surface changes. Fading, stains, or a persistent discolored patch are worth documenting. A visual mark alone does not confirm what caused it.
- Look around obstacles. Inspect accessible areas near hose connections, utility penetrations, exterior lights, and vents. Do not touch wiring, pipes, or equipment.
Use the same viewing route each time so you do not skip a wall. Begin at a corner and move along the wall in one direction, noting the upper, middle, and lower areas. Then step back and look at the whole surface again. A shadow from a tree, roof edge, or uneven light can resemble a change in the siding, so compare the area from another angle before you record it as a concern. Keep the original photograph even if the mark later looks like a shadow; it documents what prompted the closer look.
Take at least one wider photo that shows the wall and a closer photo of the visible condition, both from a safe location. Include a recognizable feature, such as a window or corner, so you can identify the spot later. Avoid zooming so far that you lose the location. If landscaping blocks your view, note that the area was not visible rather than reaching through branches or moving heavy objects. A clear record of both findings and limits makes a later assessment more useful.
Use a repeatable order for the photos. For example, take a full-wall view first, then one image of the concern, then a third image that shows the concern beside a familiar feature. Label files with a date and wall name, such as “rear wall, lower left.” If you take a new photo later, use a similar distance and angle. The comparison can show whether a visible mark seems unchanged, has spread, or simply looks different under different light.
Vinyl siding can have material-specific details that are not shared by every siding type. The International Association of Certified Home Inspectors’ vinyl siding inspection guide discusses inspection basics for that material. Use material-specific guidance as a reference, not as a substitute for an on-site evaluation of a suspected defect.
What should you check around trim, windows, and joints?
Changes often stand out where siding meets another surface. From the ground, look at window and door trim, outside corners, roof-wall intersections visible from below, and the edges around vents or other openings. Focus on whether parts appear separated, cracked, missing, or different from the surrounding finish.
- Check whether trim looks secure and aligned, without visibly open gaps or broken sections.
- Look at visible joints and sealant for gaps, splits, or areas that appear detached. Do not assume every joint should be sealed the same way; the appropriate detail depends on the siding system.
- Observe the siding around window and door edges for changes in spacing, staining, or distortion.
- Note any visible damage where siding meets a deck, porch, or another wall surface, but do not dismantle the connection to inspect behind it.
Do not apply new caulk simply because a joint looks open. Some siding systems rely on specific clearances and drainage details. A product or installation detail that blocks a drainage path may create a different problem. If you are unsure what a joint is designed to do, include a clear photo and ask an experienced siding professional to assess it.
Pay attention to patterns rather than treating each joint as an isolated item. A gap at one trim corner, a stain below the same window, and a change in the adjacent siding may deserve a closer look together. Record the relationship between the details, but avoid deciding that one caused another. On the other hand, one small separation that appears unchanged and has no related visible signs still merits an accurate note, not an automatic repair.
How can you spot possible moisture concerns?
Visible clues can include staining, paint or finish changes on adjacent trim, soft-looking or deteriorated material, persistent damp-looking areas, or growth on surfaces. These signs can have different causes, and a picture from outdoors cannot show what is happening behind the siding. Treat them as reasons to document and investigate, not as proof of a leak.
Pay attention to places where water may collect or where materials meet: lower wall edges, window corners, penetrations, and transitions. Notice whether a mark changes after rain or remains visible through a dry period. You can compare photographs taken on different dates, but do not wait for a new storm if you see active water entering the home or damage that appears to be worsening. Contact an appropriate professional for prompt advice.
For a useful comparison, write down the date, recent weather if known, and the specific appearance of the mark. “Dark vertical streak below the left side of the kitchen window, first noticed after a rainy week” is an observation. “The window is leaking” is a conclusion that a visual check cannot confirm. If there is a related interior concern, note where it is inside as well, but do not remove siding or trim to investigate the connection yourself.
A municipal home inspection checklist includes siding materials and exterior condition items. It is a general checklist, not Washington-specific installation guidance; use it only as a reminder to observe visible exterior conditions. For a local review of siding options or a suspected issue, Landmark’s vinyl siding information can help you explore one of the materials it covers.
What should you record during the inspection?
Useful notes are specific and neutral. Write down where a condition is, what it looks like, when you noticed it, and whether you have seen it change. Avoid writing a diagnosis such as “leaking behind siding” unless a professional has confirmed it. “Dark mark below the second-floor window on the rear wall; photographed October 13” is easier to verify.
| What you observe | What to record | Practical next step |
|---|---|---|
| Cracked, chipped, or missing section | Wall, approximate height, size, and nearby features | Take a ground-level photo and arrange an assessment if the area is exposed or the damage is extensive. |
| Panel appears loose or out of alignment | Whether one section or several are affected | Do not pull or fasten it yourself; ask a siding professional to evaluate attachment and surrounding details. |
| Stain or persistent discoloration | Color, location, date, and whether it changes after rain | Document it and seek evaluation if it persists, spreads, or appears with interior moisture. |
| Gap or split near trim or an opening | The joint involved and a clear photo from a safe distance | Request guidance before adding sealant or covering the gap. |
| Broad wear or damage across multiple walls | Which walls are affected and the visible pattern | Compare repair and replacement paths after an on-site review. |
Keep photographs together in a folder and label them by wall and date. If you already have repair records, product paperwork, or photographs from earlier years, gather them for comparison. That history can help an inspector understand whether a condition is new, recurring, or limited to one location.
It can help to divide your record into three columns: “observed,” “not visible,” and “follow-up question.” For instance, write “two cracked pieces beside the rear door” under observed, “upper wall hidden by tree branches” under not visible, and “does the trim need repair with the siding?” under follow-up. This keeps uncertainty clear and helps the person reviewing the home focus on what you actually saw.
Do not try to estimate the depth of damage, the amount of water behind a wall, or the amount of material to replace from a photograph. Those details require closer evaluation. Your job during a visual checklist review is to provide a reliable location, description, and timeline, not to specify a repair method.
How do siding types change what you can observe?
The same visible symptom can look different depending on the material and installation. Vinyl sections may show a shift in alignment or a broken area. Wood siding may show a split, edge deterioration, or a finish change. Fiber cement may show a crack or damaged edge. These examples describe visible conditions only; they do not establish what caused them or whether a component needs repair.
Do not use force to test whether a board or panel is secure, and do not scrape a finish to identify a material. If you know the siding type, include it in your notes and locate any product information you have. If you do not know it, describe what you see without guessing. The inspector can identify material and assess how its details meet trim, openings, and adjacent surfaces.
A checklist is most useful when it separates general observations from material-specific questions. You can consistently note a crack, stain, missing piece, or gap on any wall. Questions about clearances, fastening, joint treatment, and compatible repair materials should be answered in the context of that siding system, rather than borrowed from advice for another material.
When is a siding repair or replacement assessment appropriate?
A single, localized defect may be a candidate for repair, while widespread or recurring visible concerns may lead to a broader evaluation. Neither appearance nor age alone can determine the right scope. The material, extent of damage, condition of nearby areas, and details behind the visible surface all matter.
Consider requesting an assessment if you find missing or loose siding, repeated damage in the same area, a pattern of staining, separated trim, or concerns on more than one wall. An inspection can help establish what is visible, what needs closer evaluation, and whether repair or a larger project should be considered. Ask the contractor to explain the evidence for the proposed scope and identify any areas they could not evaluate.
For a focused issue, ask whether the assessment can identify the affected area and whether nearby siding or trim also needs attention. For concerns across several walls, ask how the recommended scope relates to the pattern you documented. You can also ask what remains uncertain, what additional access or evaluation is needed, and whether the recommendation is repair, further investigation, or consideration of replacement. Clear answers help you compare options without assuming that every visible defect calls for the same response.
For practical examples of how siding concerns and next steps differ, see Landmark’s siding repair guide and siding replacement process guide. These resources can help you prepare questions, but an article cannot determine the condition of a specific wall.
How should you use your siding inspection checklist?
Walk the exterior once, wall by wall, then review your photos and notes together. Separate observations from assumptions. Put urgent concerns, such as active water entry or a loose section that could fall, at the top of your list. For everything else, organize the findings by location and ask which ones need a closer look.
Before you contact a siding professional, select the clearest overall and detail photos. State whether the issue is on one wall or several, when you first noticed it, and whether it seems to have changed. Mention any areas you could not see. You do not need to provide a technical diagnosis or choose between repair and replacement before requesting advice.
Get a siding project assessment
Frequently asked questions
How often should I use a siding inspection checklist?
A homeowner can make a visual review periodically and after noticing a new concern, such as a loose-looking panel or persistent stain. The right schedule depends on the home and its conditions. A visual walk-around is not a substitute for a professional inspection when damage is suspected.
Can I inspect siding from a ladder?
This checklist is designed for a ground-level review. Do not climb or lean a ladder against the siding to investigate a defect. Ask a qualified professional to assess areas that are high, unstable, or otherwise unsafe to reach.
Does a dark mark mean water is behind the siding?
No. A mark is a visible condition, not a diagnosis. Record where it appears and whether it changes, then seek an evaluation if it persists, spreads, or occurs alongside other signs of moisture.
Should I seal a gap as soon as I see it?
Not without understanding the siding detail. Some joints need a particular treatment or clearance, and an incorrect seal can interfere with how the assembly is intended to work. Photograph the area and ask a siding professional what should happen next.
Can I use the same inspection steps for every siding material?
You can use the same safe process to look for and document visible changes. The right repair or installation detail depends on the material and system, so do not apply instructions for one siding type to another without confirming they fit.
What is the safest next step?
A careful visual review can help you notice changes and describe them clearly, but it cannot reveal every condition behind the siding. Keep your notes factual, avoid disturbing the exterior, and request an on-site assessment when damage or moisture concerns need a closer look.